

Bright as a Button
Do you have a box of buttons at home, gathered together over the years? But what if a button needs replacing? Are you up to the job?

Make Do and Mend
Do you find that occasionally you seem to have a few items of clothing that need a minor repair - broken zip, missing button, trouser hem undone? I generally have a ‘repair session’ in front of a good film and get everything mended in one go.
I recently found myself seeking out buttons from my button box to replace some which had gone missing from a shirt. I remember, as a child, spending hours looking through the button box at my grandparents’ house. There were all manner of treasures in there, and my recent repair session brought back memories of this activity I so enjoyed.
Where Did the Button Come From?
I was curious to find out when the humble button became such an integral part of our everyday lives, so I embarked upon a little research. I knew that buttons had been around for a considerable time. However, I was surprised to find out that the earliest known button still in existence is dated to 2000 BCE, credited to the Indus Civilisation, a Bronze Age civilisation that lived in the northwest regions of South Asia. This area includes much of modern-day Pakistan, northwestern India and northeast Afghanistan. This surviving button is made from a shell and would have been an indicator of a person’s wealth and stature within the community, worn on a garment as an adornment rather than a fastening.
The Romans used buttons as fastenings and as decoration by fixing them in place with pins. But it was not until the Middle Ages that the buttonhole was invented, transforming clothing. This simple invention changed fashion forever.
The Industrial Revolution brought about mass production so that the humble button could be enjoyed by all. Until then, they were still the preserve of the wealthy and a symbol of status. Today, the range of buttons available is astounding. They are made from so many different materials, from horn and wood to plastic and glass - there is a button for everyone and every situation! Not only do they offer functionality to our garments, but they are also widely used in the fashion industry to add detail and accents to many of our clothes. Changing the buttons on a garment is a simple and inexpensive way for the wearer to express their style.
How Do You Measure Up?
So, we all rely on the quiet and unassuming button, but when disaster strikes and one becomes detached from your clothes, are you able to stitch it back in place? A survey by YouGov carried out in 2017 found that 20% of UK adults were unable to sew on a button. Of those surveyed in the 18-24 age range, around a third could not complete this task! If you are one of those people, read on.
The 2 Hole Button
Cut about 30cm (12 inches) of thread.
Thread the needle and tie a knot at the end.
Place the button over the hole where it needs to be sewn.
Push the needle up from under the fabric through one buttonhole.
Pull the thread all the way through.
Push the needle down through the second hole and pull tight.
Repeat this 4–6 times to secure the button.
Finish Off
On the last stitch, bring the needle under the button and wrap the thread around the stitches 2–3 times.
Push the needle to the back of the fabric and make a small knot by looping it through the back of the stitching.
Trim the excess thread.
And that’s it! Your button is securely attached.
The 4 Hole Button
Follow the steps above for a 2 hole button.
The two most common ways to sew a 4-hole button:
Parallel: Stitch straight across from one hole to the opposite hole. Repeat on the other pair.
Diagonal (X-shape): Stitch diagonally from one hole to its opposite, making an "X" pattern.
Repeat each stitch 4–6 times to secure the button and then finish as above.
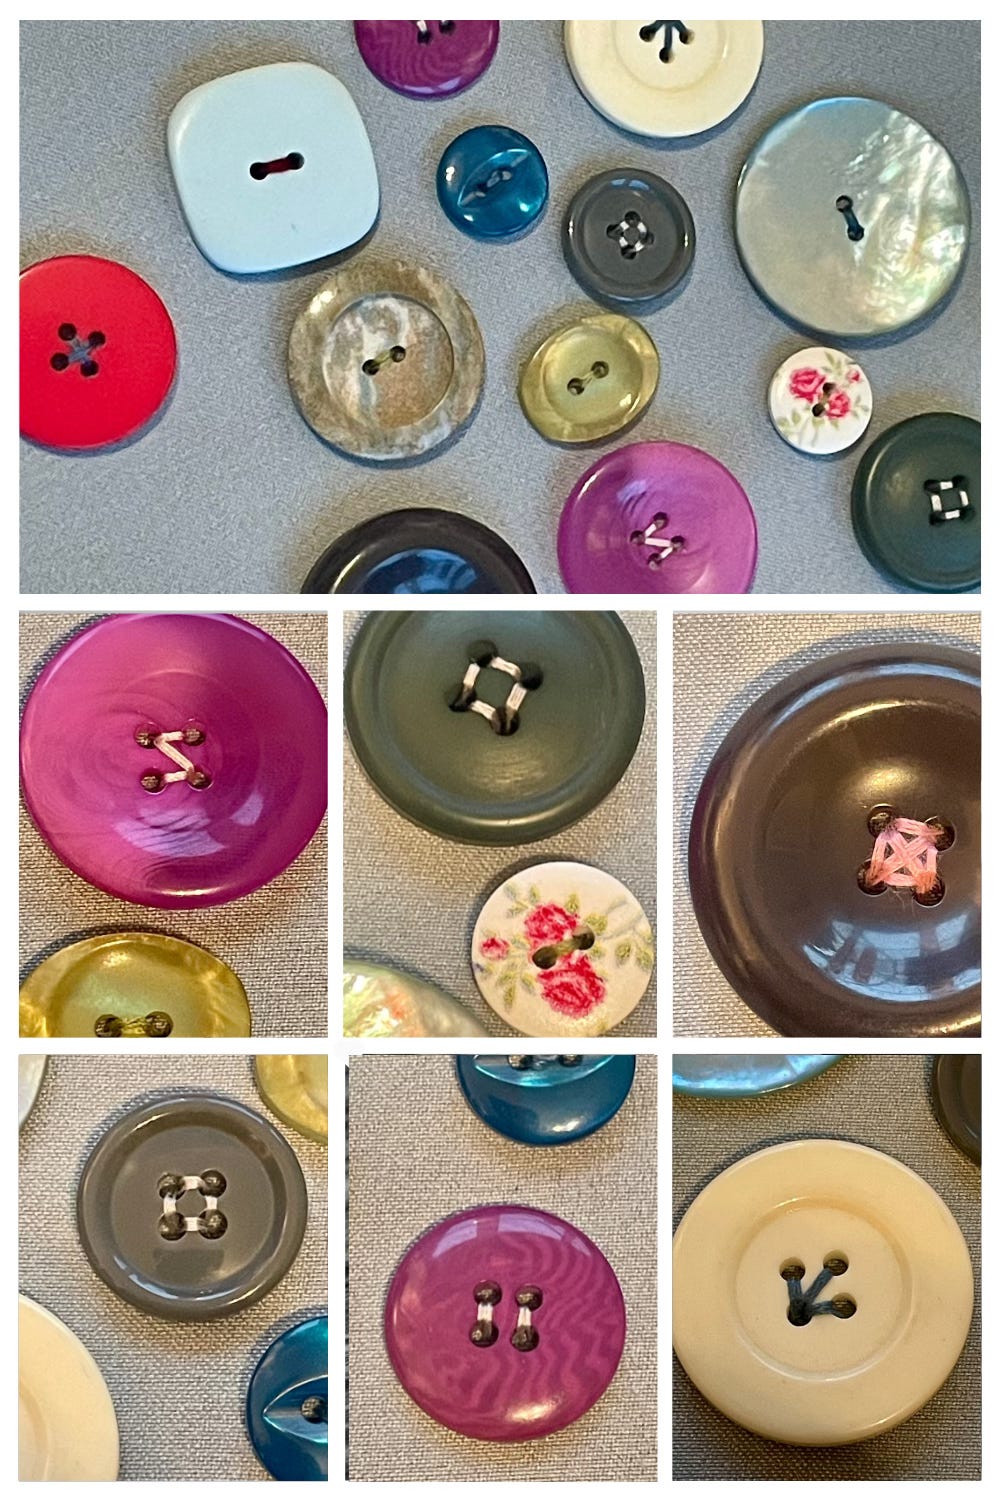
You can be a little more creative when sewing on a 4 hole button if you wish. Try stitching around the holes to create a square, maybe add a cross stitch through the centre, or try a starburst effect radiating from one hole. Use the photos for inspiration and as a starting point for your own designs! Don’t be afraid to go wild with buttons and make a real statement!
Happy sewing,
Suzanne, Charlotte and Rebecca